Improve These Five Yoga Poses With Help From the TRX
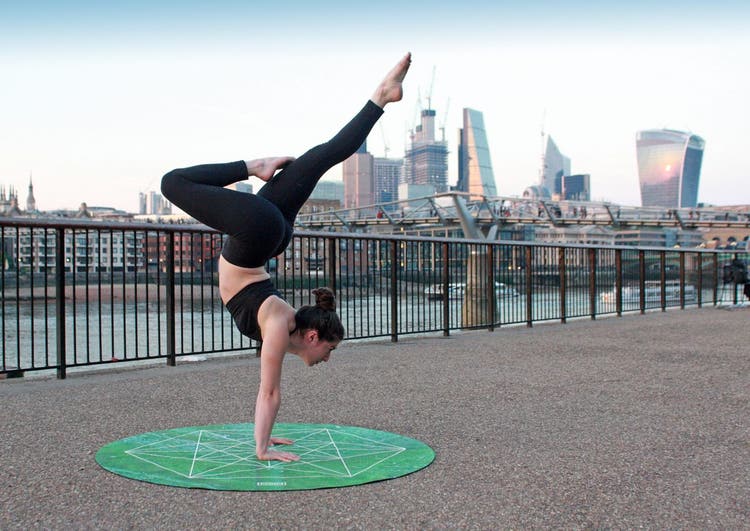
Ask any fitness professional and chances are they will tell you that yoga is a practice you must add to your fitness routine. Yoga improves flexibility, balance and neuromuscular control (to name a few benefits)—all while toning and strengthening your muscles. But for many people new to yoga, some of the poses can be difficult.
The TRX Suspension Trainer is an excellent tool to scale, complement and improve your yoga practice. Here are five TRX exercises for yoga moves with progressions that will help you get stronger off your mat so you can feel more confident during your flow.
TRX for Warrior II
Warrior II is a popular yoga pose that strengthens your legs and opens up your hips and chest. The TRX Suspension Trainer assists in helping you open your chest by positioning your shoulders down and back while holding your arms and hands in a powerful extended position, allowing you to go deeper into your pose.
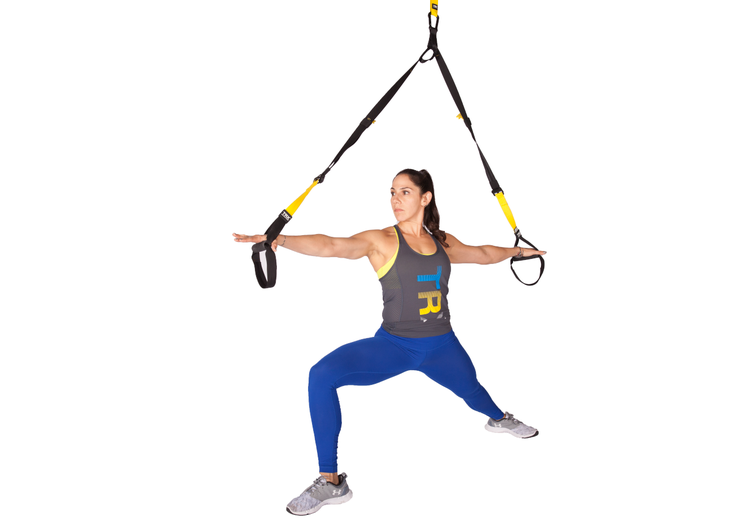
- Adjust the straps to midlength.
- Stand beneath your anchor point with one hand on each handle.
- Step forward with one foot into a lunge position, and then turn out your back foot so that it is perpendicular to your front heel.
- Place your weight in the outside of your back foot with your arms reaching out. Press down into the handles to engage under your shoulder blades.
- Turn your head so you are looking over your front fingertips.
- To return, bring your arms back to center and step back with your front leg.
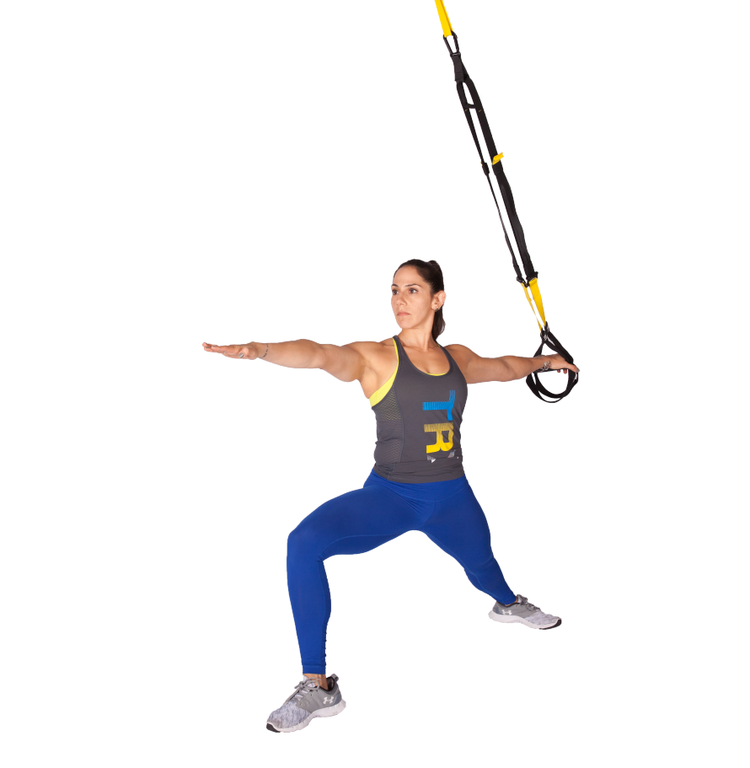
- In this progression, follow the setup of Progression 1, but grab both handles with your back hand.
- Maintain your front arm at even height and continue to engage through both arms evenly.
- Repeat each progression on each side.
TRX for Warrior III
Warrior III is a stunning pose that challenges your hamstrings, core and balance. Here are a few ways you can integrate the TRX Suspension Trainer to achieve, improve or perfect your Warrior III.
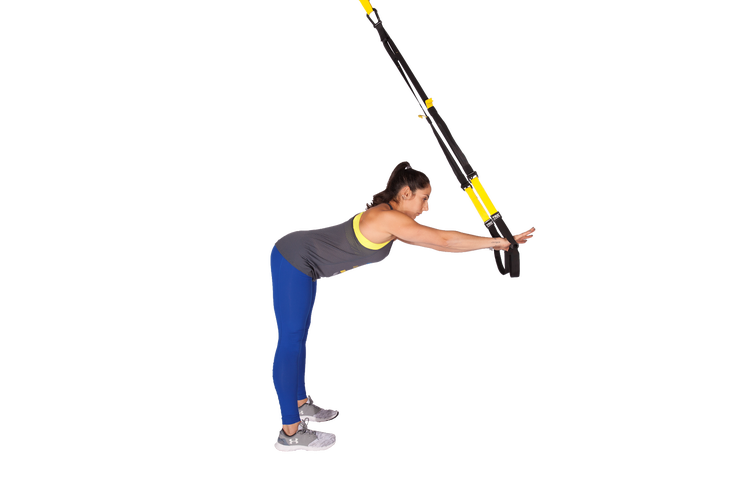
Warrior III requires that you fold forward, hinging at your hips, and extend your arms out in front of you. This TRX hinge will help you develop an understanding of the hip hinge while improving your hamstring flexibility.
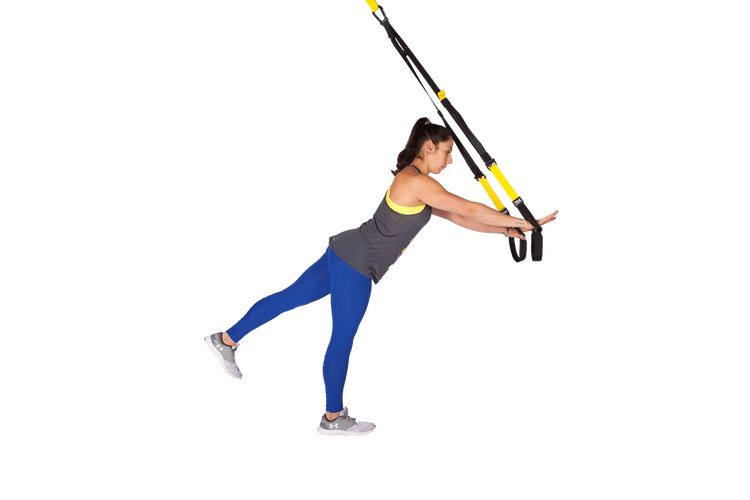
- Stand facing the Suspension Trainer with your feet slightly wider than your shoulders.
- Drive your hands into the foot cradles and fold forward by pushing your hips back.
- Maintain pressure on the straps as you return to the top.
This is similar to Progression 1, only this time you are on one leg. Focus on keeping your hips square and your feet pointed forward. Don’t worry so much about getting parallel to the floor; think more about keeping your torso and elevated leg in a straight line.
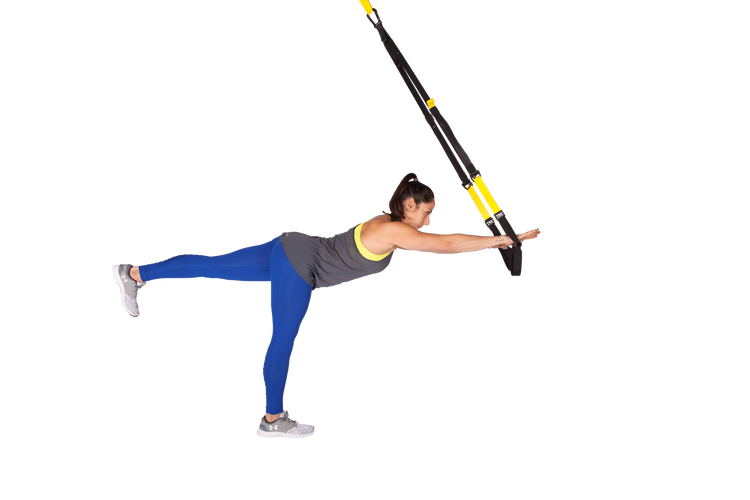
When you’re ready, extend your arms out in front of you into full Warrior III. Press your hands down into the straps for a greater stretch and to help you balance.
Try incorporating this sequence into your practice, or just practice this sequence when you can’t make it to class.
TRX for Dancer
The Dancer Pose (Lord of the Dance Pose) is an elegant pose that requires balance and flexibility. Let the TRX Suspension Trainer assist you with your balance as you use the straps to go deeper into the pose and increase your flexibility. Following this sequence will transform you into a graceful dancer in no time.
Progression 1
- Adjust the straps to midlength, and begin this progression (TRX low lunge) facing away from the anchor point.
- Place one foot into the foot cradle with your knee on the floor. Your opposite foot should be placed in front of you with your knee bent.
- Carefully place your hands onto your front thigh, and adjust your hips so they face forward. Alignment here is key.
- If available, you can bend your back knee and reach your same hand back to grab either the straps or the handle.
- To come out of the pose, carefully release the straps and take your suspended foot out of the foot cradles.
Progression 2
- In this progression, place yourself so you are standing in front of the straps with one foot into both foot cradles.
- Bend your back knee and reach your same hand for the straps.
- Keep your chest lifted and try not to dump all your weight forward. Use the straps to continue lifting your foot up. Grab the handles to deepen the stretch.
- Reach your opposite hand forward.
- To release, carefully return your foot down and remove it from the foot cradles.

- From Progression 2, reach back with your opposite hand to grab onto the straps.
- Place your hands along the straps so that they are right next to each other.
- As you ground through your standing leg, begin to walk your hands down closer to your foot as your flexibility allows.
- Press your foot into the straps as you create strap tension by pulling with your hands either in the handles or farther up on the straps. Maintain a lifted chest.
- To unwind, carefully return your foot down to the earth and remove it from the foot cradles. Use your hands on the straps to assist, if necessary.
TRX for Headstand
Today, we get to work on the oh-so-popular headstand. Headstands can be exciting and intimidating, and this progression provides an excellent way to develop the foundation and confidence you’ll need. Like many inversions, this pose is all about core strength and protecting your neck. This progression on the TRX Suspension Trainer will first help you establish your base and then safely help you develop the core strength and control to get fully inverted.
Your focus for this progression should be establishing your base through your arms and shoulders and engaging your core for a rock-solid plank.
- Begin facing away from the anchor point, with one foot in both straps, the other toes on the ground.
- Place your forearms on the ground and drive your hips up toward the ceiling directly over your shoulders so you are bent at your hips and your head rests on the ground.
- Hold this position as long as is comfortable and engage your core.
- Switch sides.
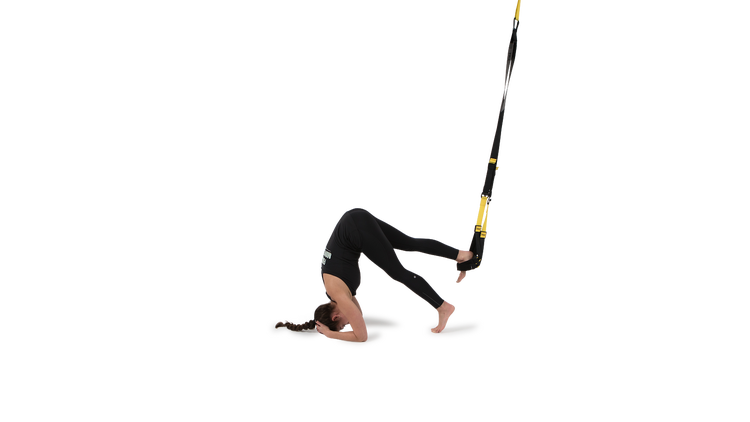
- Begin facing away from the anchor point, with one foot in both straps, the other toes on the ground.
- Place your forearms on the ground and drive your hips up toward the ceiling directly over your shoulders so you are bent at your hips and your head rests on the ground.
- Take your toes off the floor and bring your knee up to be parallel with your straight knee, foot pointed toward the ceiling.
- Hold this position as long as is comfortable and engage your core.
- Switch sides.
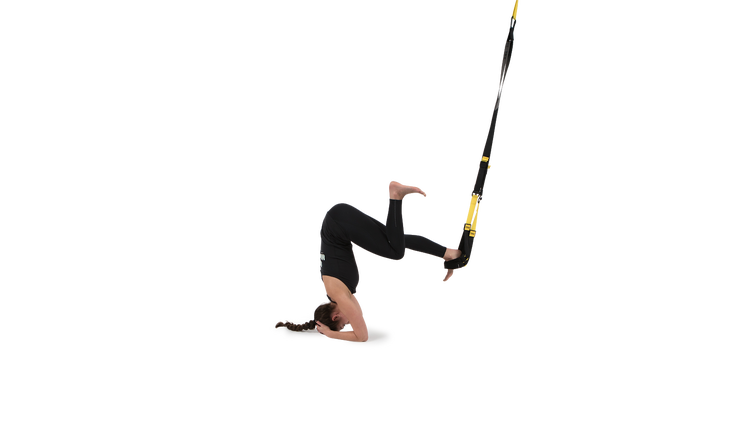
- Begin facing away from the anchor point, with one foot in both straps, the other toes on the ground.
- Place your forearms on the ground and drive your hips up toward the ceiling directly over your shoulders so you are bent at your hips and your head rests on the ground.
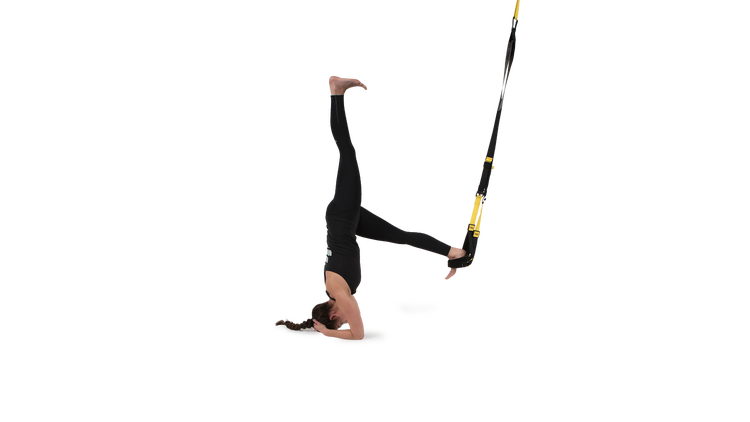
- Take your toes off the floor and bring your leg up directly above you so you form one long line from your shoulders to your toes. Flex your foot so the bottom of the foot is pointed toward the ceiling.
- Hold this position as long as is comfortable and engage your core.
- Switch sides.
TRX for Handstand
For most people, inverted poses can be challenging and intimidating. Similar to using a wall or partner to assist you into an inverted pose, the TRX Suspension Trainer can serve as a great tool to help you slide into an inversion and feel confident along the way. By using the following sequence built just for you, there is no doubt you will easily lift into a handstand both independently and for good!

This is also called a TRX standing split.
- Stand facing away from the anchor point with one foot in both foot cradles.
- Slowly lower your hands to the ground in front of you. You should more or less be on all fours now as you walk yourself back and slowly transition into what will begin to resemble a three-legged Downward-Facing Dog.
- Continue to walk your hands toward the back of the room as you play with taking your non-suspended leg off the ground and reach it toward the sky. The leg that is suspended in the Suspension Trainer extends farther toward the ceiling. The farther back you walk, the more intense and necessary the core activation becomes. You progress by walking your hands as far back as you can. If you get to this point, rest assured your arms will get worked!
- To release out of the pose, slowly walk your hands and your non-suspended leg forward toward the anchor.
- Once there, carefully bring your extended leg back down to the earth and make your way back on all fours. Once stable, remove your foot from the cradles.
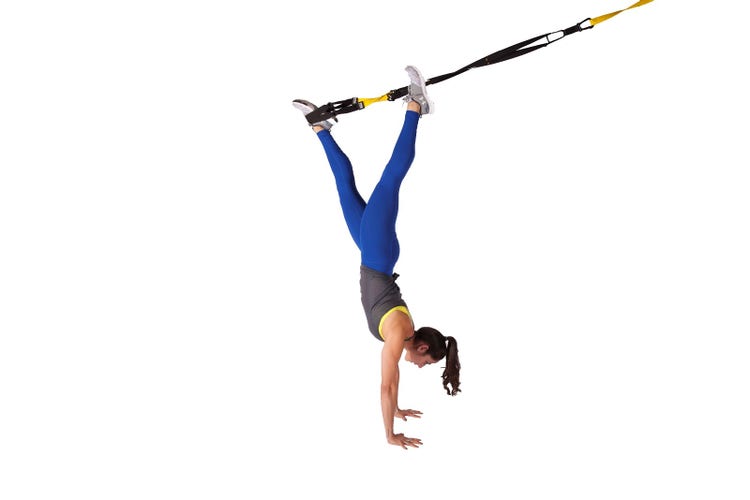
Progression 2
- Starting from the TRX standing split, press your hands strongly into the floor and drive your back heel forcefully into the foot cradles to bring your non-suspended foot off the floor.
- Bend your free leg and bring your knee to your chest. Drive your suspended heel strongly into the foot cradles.
- Squeeze your bellybutton into your spine to engage your core.
- To come out of the progression, release your non-suspended leg back down to the ground.
- Slowly begin to walk your hands and your free leg forward toward the anchor. This will put you back on all fours.
- After you regain stability, remove the foot cradles.
- From Progression 2, try lifting your non-suspended leg toward your suspended leg.
- Keep tension on the straps. Engage your core and continue to press your hands firmly into the earth. Hold for two to three breaths.
- To come out of the pose, slowly lower your non-suspended leg back down to the ground.
- Carefully begin to walk your hands and your non-suspended leg forward toward the anchor. Carefully remove the foot cradles.
Photo credit: Form, Unsplash; Courtesy of TRX