Solar Flow Power, From Your Core
Yoga delivers more than peace, love and happiness. Light up your midsection with asanas that train and challenge your core, and more.
What You Need
- Yoga mat
- Clear space for movement
- Optional: block for support
Practice Time:
The entire practice is designed to be 60-90 minutes depending on the length of your time spent in meditation and savasana.
- 60-Minute Practice: Practice Prep + Core + Flow + Savasana
- 45-Minute Practice: Practice Prep + Core + Savasana
- 30-Minute Practice: Practice Prep + Flow + Savasana
Practice Prep
Preparation is everything. Approach your practice with deliberate reverence. Take time to warm up your joints, think about how you are feeling, mind, body and soul, and bring all of it with your fullest mindfulness onto your mat. Take as little as five or up to ten minutes, as needed, to move through the practice prep. It is intended to warm your tissues and increase your body’s readiness, as well as expand your range of motion for the practice.
Prep Sequence Part 1
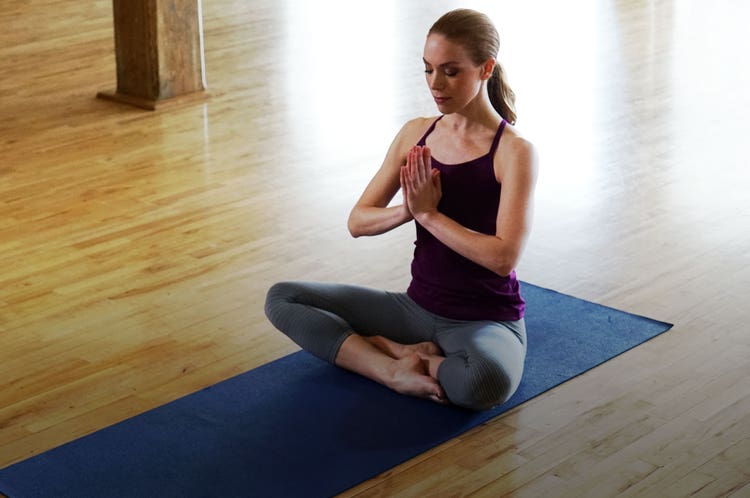
A. Seated Breath
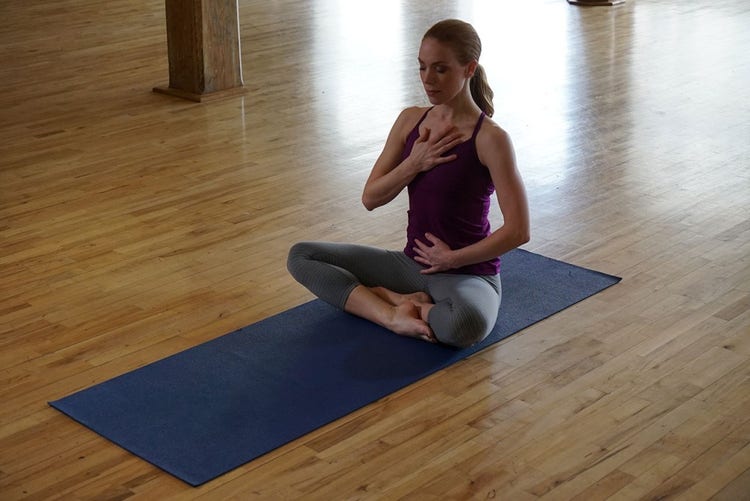
Sit cross-legged with your best posture. Rest your hands on your belly and chest, and feel your breath in your body for up to one minute.
B. Setting an Intention
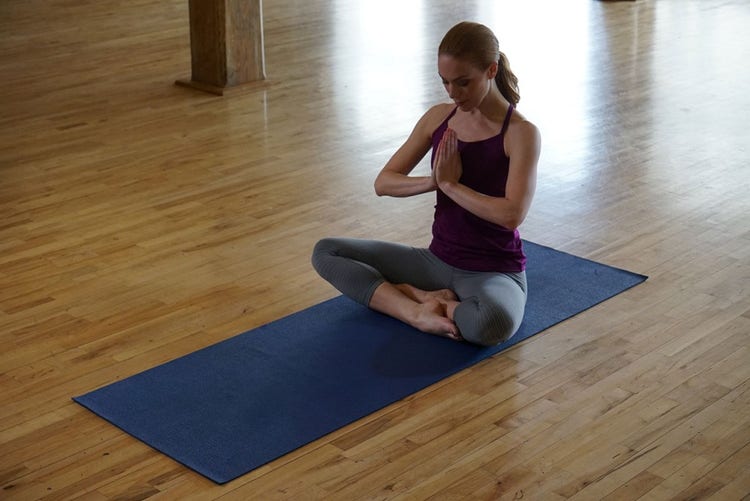
1. Bring your hands to Anjali mudra (palms pressed together in front of your chest,) also known as the Namaste position. Bow your head.
2. Take three deep breaths and exhale fully with each breath, as you bring to mind the power that you have in your core and in your ability, to create change in your life.
3. Hold the vision of what you truly wish to create in your mind and continue breathing for up to one minute.
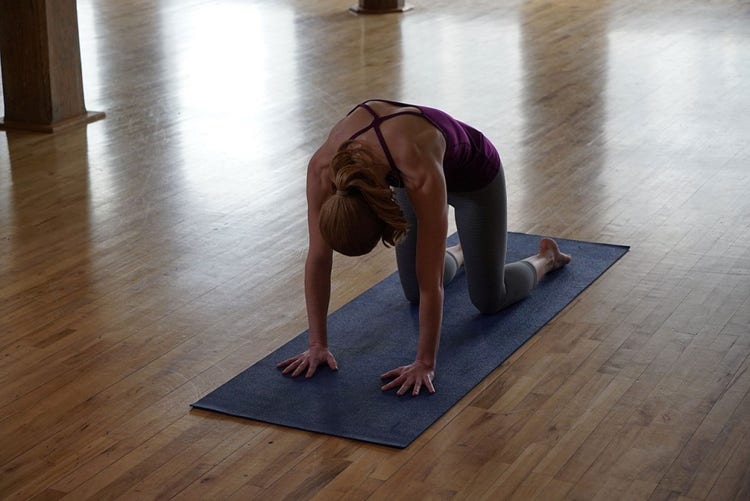
C. Child’s Pose
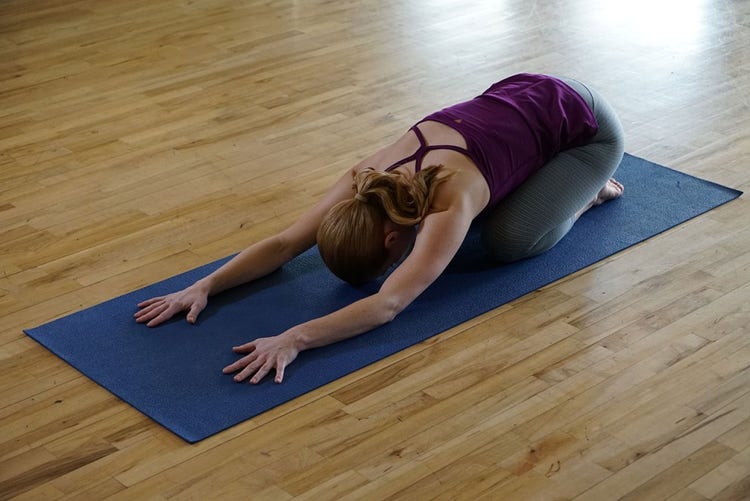
1. Come to your hands and knees, and shift your hips back to your heels as you lower your chest to your knees.
2. Keep your core engaged and your shoulders and neck relaxed.
3. Reach your arms forward and feel your breath create space in your back.
4. Adjust the width of your knees as necessary for a comfortable pose.
5. Hold and breathe for up to one minute.
Prep Sequence Part 2
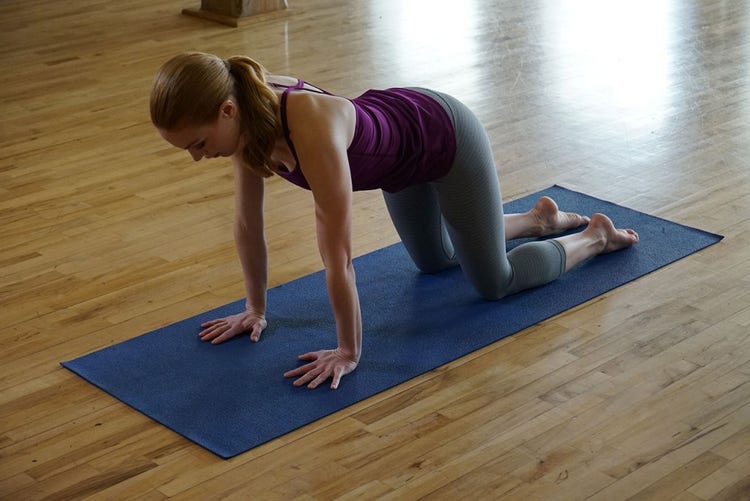
A. Cat Pose
1. Come to your hands and knees, and place your wrists directly under your shoulders and your knees directly under your hips.
2. Point your fingertips to the top of your mat, and adjust your shins and knees so they’re hip-width apart.
3. Find a neutral position with your neck and spine, and soften your gaze, looking slightly down with easy eyes.
4. Engage your core, exhale and round your back toward the ceiling, imagining you are a cat stretching its back. Keep your tongue on the roof of your mouth and softly release the crown of your head toward the floor.
5. Move back and forth between Cat and Cow (the next movement) and breathe for up to one minute.
B. Cow Pose

1. Moving from Cat pose, inhale and release your belly toward the mat.
2. Lift your chin and chest, and gaze up toward the ceiling, making a soft arch in your spine. Imagine moving your tailbone away from your sternum.
3. Keep your shoulder blades broad, and move them down and away from your ears.
4. Move back and forth between Cat and Cow and breathe for up to one minute.
C. Bird Dog
1. Start on your hands and knees, engaging your core to keep your spine and neck in a neutral position.
2. Gaze down at the floor, and slowly extend one leg behind you while reaching your opposite arm forward. Maintain your hips and shoulders in a stable position, squared off, and be sure that your lower back doesn’t arch.
3. Create space in the pose, holding for about 30 seconds and then switch sides.
4. Alternate back and forth and breathe for up to one minute.
Core Transformation
Everything we do, especially when done well, involves our core musculature. Moving consciously and paying attention to the freedom or restriction and the relative strength or weakness of your upper body and lower body enable you to access additional strength, stability and mobility from your center – across all movement and activities. These poses are intended to inform you and challenge your mental and emotional resilience and physical ability to move with more precision and power.
Core Transformation Sequence
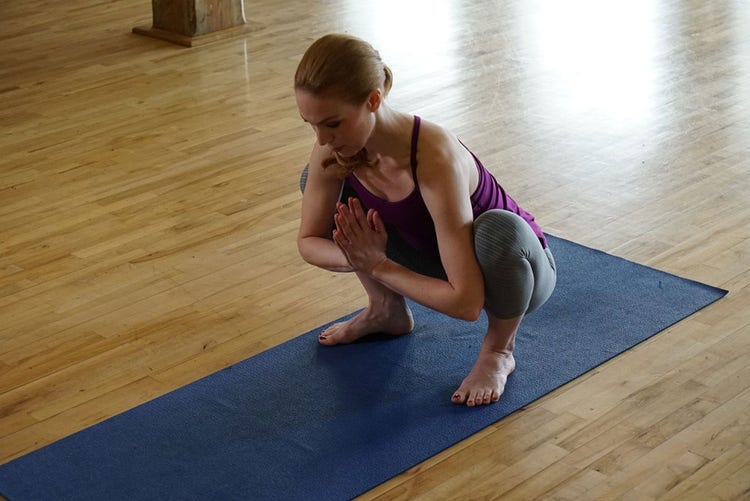
A. Yoga Squat with Rotation
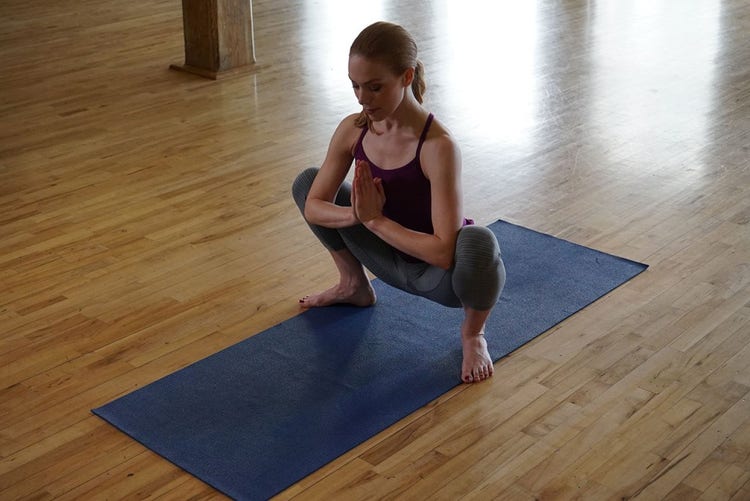
Malasana, also known as Garland Pose, is a hip-opening yoga posture that can help lengthen and open the hips, and add mobility where it is lacking. This powerful hip opener is challenging for many of us, due to limited hip and ankle flexibility.
1. Come to a wide squat, bending your knees and lowering your hips. Keep thighs slightly wider than your torso, but allow feet to stay as close together as possible. If your heels do not easily touch the ground, support them with a folded mat or blanket.
2. Lean forward slightly to place your elbows along the inside of your knees and the palms of your hands together in prayer position. Try to lengthen your spine in the pose and engage your core. Shift your position as needed in the pose.
3. Place your hands on the floor and anchor into the ground. Keeping your body stable and core engaged, reach one arm up and away at a diagonal rotation, allowing your gaze to follow. Return to center and repeat on the other side.
4. Continue to alternate sides, breathing, for 30 seconds up to one minute.
B. Crow Pose Balance
This pose brings us to the core of our self-trust. As we begin the arm balance part of the movement, we worry whether we’ll fall, or fly. The transformation from fear to trust is real and powerful, and this pose makes you stronger along the way.
1. From Malasana, shift forward in your squat and place your hands firmly on the floor, shoulder distance apart.
2. Make your hands conscious and strong, and bend your elbows enough to make a shelf out of your upper arms.
3. Raise your hips up high, engage your core and position your knees against your triceps muscles.
4. Keeping your gaze soft and slightly forward of your fingers, shift your weight toward your hands, lifting your feet off the ground. If you can only lift one foot, do that; experiment until you find success.
5. Hold for as long as you can, breathing freely and building to hold the balance for 30 seconds. Return to Malasana.
C. Active Plank
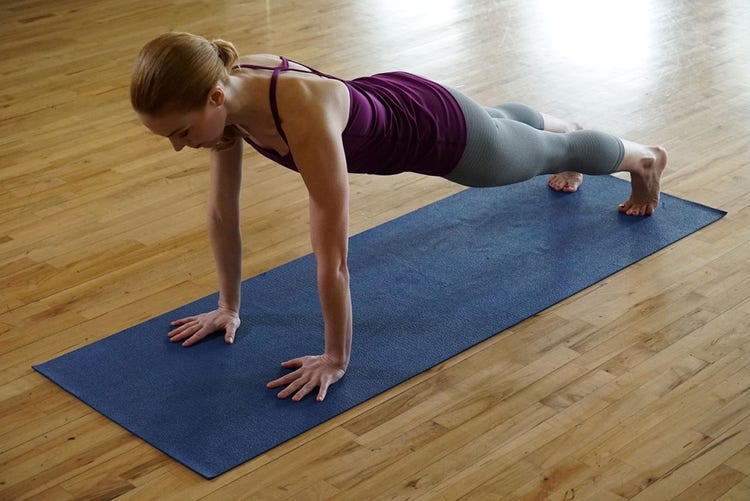
This popular posture requires everything you have to give.
1. Start in table-top position on all fours, and then come to balance on your hands and toes, arms directly beneath your shoulders and feet hip-width apart. If this is too challenging, put your knees down on the floor.
2. Keep a neutral spine and engage your core. Keep your hips level with your shoulders and don’t allow your pelvis to sag, it will cause tension in the lower back.
3. As you get more stable, work to lengthen one leg and lift it out and away from the hips for a three-pointed plank.
4. Hold and breathe for up to 30 seconds, or alternate leg lifts for one minute.
D. Side Plank
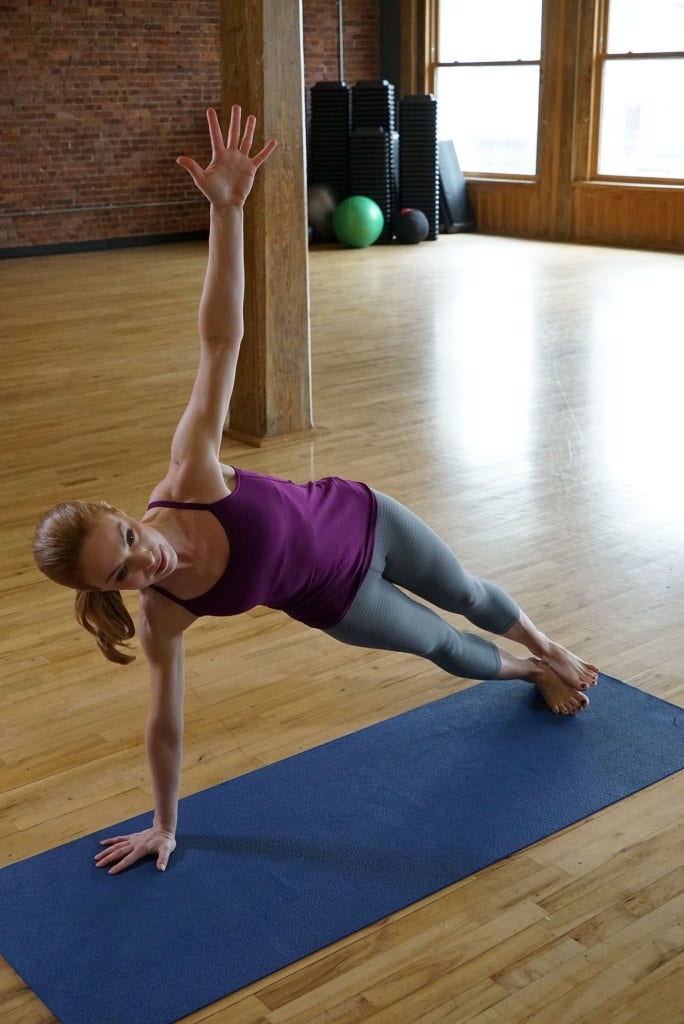
Taking Plank to the next level requires your concentration and willingness to challenge yourself.
1. From Plank, bring feet together, stacking them and then rolling to balance on one hand and the edge of your feet. Keep your body stiff and in one long line.
2. Focus on lifting your hips up to the ceiling. As you feel more stability, reach your top leg out of your hip until it lifts off and away from the balancing leg.
3. Move your top arm up to the ceiling or overhead to further express the posture.
4. If this posture feels like it is too much weight on your wrists, try resting on your lower knee or forearm, or with your top leg supporting part of the weight in a modified pose.
5. Hold and breathe for up to 30 seconds or alternate sides for one minute.
Boat Challenge
The Boat Challenge sequence provides strong core action with diverse positions and angles, to reach the depth of your strength and endurance, and feel challenged from all sides.
Boat Challenge Sequence
A. Boat
1. Start in your seated breathing posture. Sitting tall, uncross your legs and keeping your legs bent, place your hands behind you.
2. Pressing your hands into the floor, raise your feet so that your shins are parallel to the floor.
3. Balancing on your pelvic bones, bring your hands together at your sternum. Gradually straighten your legs and then your arms, toward your shins. Keep your back neutral and chest lifted.
4. Continue to energetically reach your hands toward your feet while maintaining your arms parallel to the floor.
B. Boat Rotation
1. Maintain the shape of the pose and keep your breath easy.
2. Rotate your head, torso and arms from the center to the outside of your legs, further engaging your obliques and stabilizing muscles.
3. Repeat and move to the other side, or flow back and forth.
C. High Boat
1. Maintain a neutral spine, but reach and grab the edges of your feet or big toes and extend your legs until they are straight. Keep your inner thighs and calves strongly pressed together for stability.
2. Try to use the leverage and tension within the position to increase the length of your spine in order to lift the chest higher.
3. Continue to breathe easily in this pose for 30 seconds to one minute.
D. Low Boat
1. Gently and slowly let go of your feet. Keep your spine stable and thighs compressed.
2. Reaching your arms toward your feet, slowly lower yourself onto your back, pressing your back into the floor with a lifted chest. Lower your torso until your legs and torso are at a 45-degree angle to the floor.
E. Low Boat Pulls
1. From Low Boat, pull one knee to your chest and grasp the shin with your hands, pulling it close to you for a hip compression release while stretching the other leg out to low boat.
2. With each strong exhalation, engage your core further. Hold for three seconds and then alternate side to side for 30 seconds to one minute, with focused breathing.
F. Core Rotation
1. From the Low Boat Pulls, rest your head and shoulders on your mat and hug your knees to your chest for a breath. Then, stretch your arms out from your shoulders and press firmly into the ground.
2. Keeping your knees together, exhale and lower your legs to one side until your knees and thighs are a few inches from the floor. Hold for three seconds, return to the center and repeat on the other side.
3. Alternate side to side for 30 seconds to one minute with focused breathing. Flow power You have mastered the moves, and now it’s time to show your Flow Power. Flow and connect the moves you have mastered together with breath and intention. The result is increased energy, awareness and the feeling that anything is possible.
Flow Power Sequence
Here is the flow shown in video, with detailed instructions on each pose to follow.
A. Downward Facing Dog
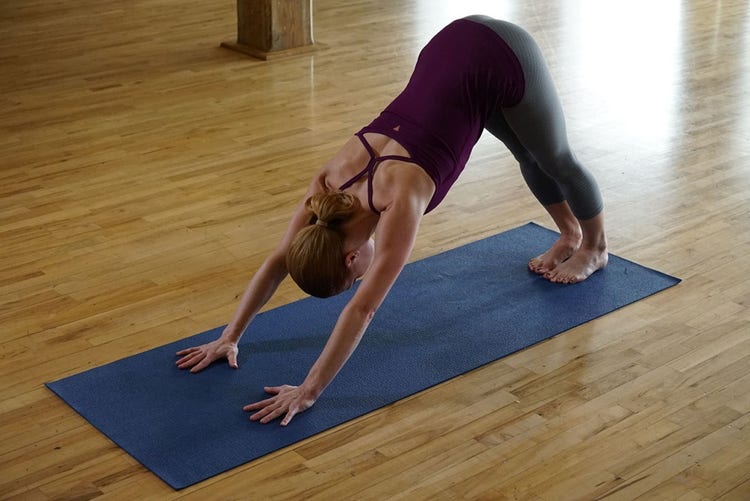
1. Start in table-top pose (or Plank pose). Align your wrists directly under your shoulders and your knees directly under your hips, keeping your wrist crease parallel to the top edge of your mat and fingers pointing forward.
2. Straighten your arms and legs (without locking the knees) and extend your spine as you press your hands and heels down into the ground and pull your hips back and up into the air in an ͞A͟ shape.
3. Engage your thigh, core and arm muscles as you reach your heels toward the floor, and relax your head.
4. Allow the pose to become a reset button as you flow through the postures. To release, return to your hands and knees or rest in Child’s Pose.
B. Three-Legged Dog
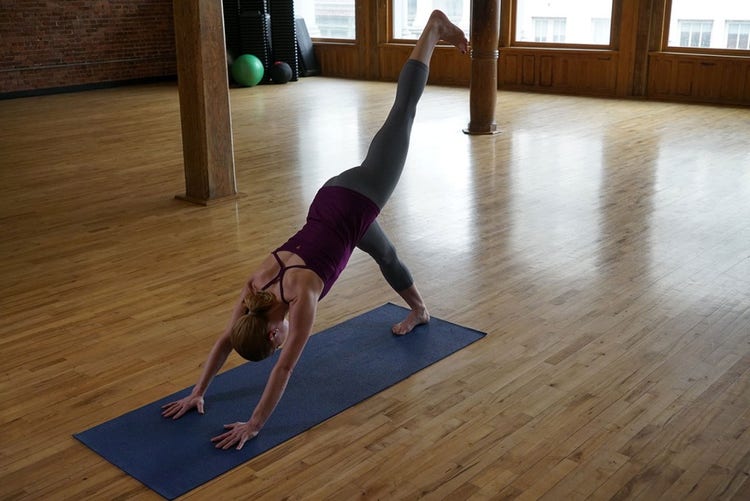
1. From Downward Facing Dog, keep your body stable and arms and legs straight. Stretch one leg to the ceiling, maintaining a neutral pelvis.
2. Switch sides and use this stretch prior to the Pigeon Pose, to open the hip flexor and connect your upper and lower body through the floor.
C. Plank
This popular posture requires everything you have to give.
1. Start in table-top position on all fours, and then come to balance on your hands and toes, arms directly beneath your shoulders and feet hip-width apart. If this is too challenging, put your knees down on the floor.
2. Keep a neutral spine and engage your core. Keep your hips level with your shoulders and don’t allow your pelvis to sag, it will cause tension in the lower back.
3. As you get more stable, work to lengthen one leg and lift it out and away from the hips for a three-pointed plank.
4. Hold and breathe for up to 30 seconds, or alternate leg lifts for one minute.
D. Chaturanga
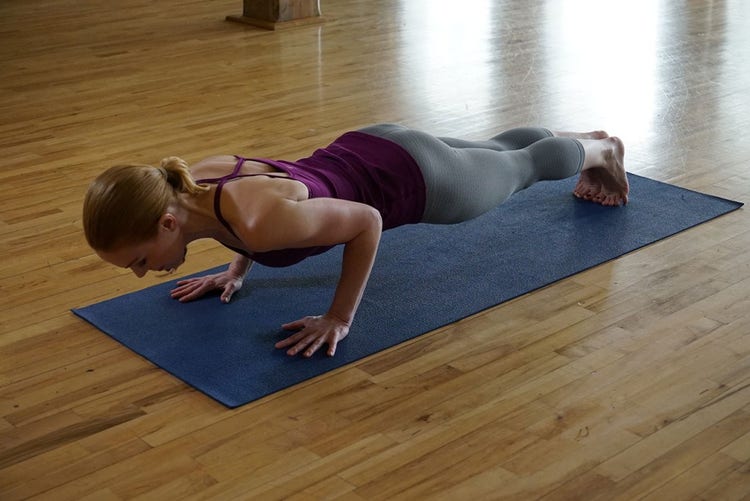
This pose generates massive heat and connective power for your flow. It’s worth it to build up for this pose and not rush your understanding. Explore the way you relate to the ground surface through the transitions.
1. Begin in Plank with your arms at a 90-degree angle to the floor.
2. Keeping your elbows tight against your ribs, shift your body forward to lower down toward the ground until you hover a few inches from the floor.
3. Stay broad across your collarbones with your upper back muscles and shoulder blades firmly anchored. Maintain neutral hips, spine and neck and a firm muscle tension in your legs and core.
4. You can unload the posture by releasing your knees to the ground.
E. Upward Facing Dog
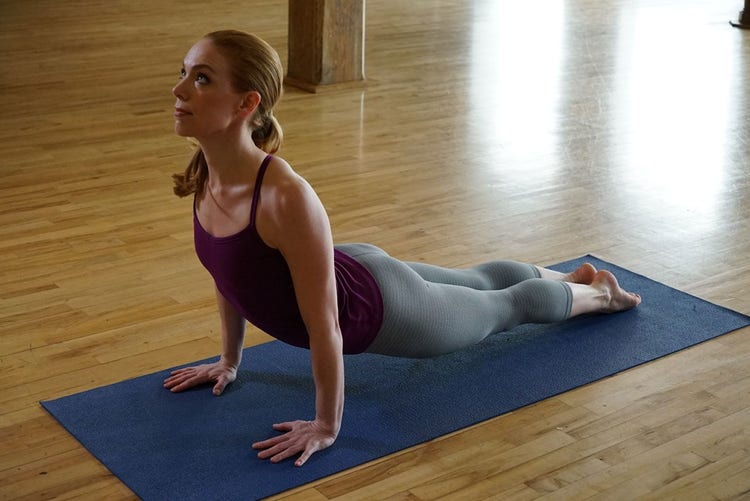
1. From Chaturanga, push off your feet and swing your pelvis forward and upward to lift your chest to the ceiling. Keep your fingers spread wide and press down into your hands, spreading your collar bones and bringing the shoulders back.
2. Keep your elbows by your side, roll your shoulders onto your back, and continue to lengthen your spine toward the ceiling through the top of your crown, with core engaged, thighs strong and the tops of your feet pressing down into the ground.
3. Keep breath free and comfortable in and out of this pose, and use this moment to get clarity as you flow. If it’s too challenging, allow your thighs to come to the ground or practice flowing between Cat and Cow instead.
F. Pigeon
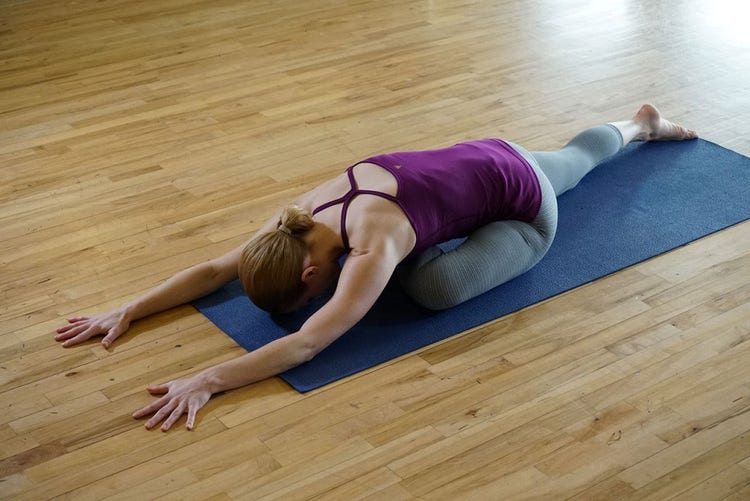
This modified Pigeon pose is a commonly practiced prep, and it serves as a transition in the flow that helps open the hips. It is a great pose, but it may or may not be the one for you. Try it in the flow and determine for yourself. There should not be pain in your knees or back — so adjust or move out of the pose if you have pain.
1. Moving from Downward Facing Dog or Three-Legged Dog, keep your pelvis level and bring your right knee forward about halfway. Rest here and turn out your hip so you can slide it toward the side.
2. Lower your body, extending your left leg behind you so that your shin and knee touch the floor.
3. Keep your pelvis level. When you’re ready, fold your torso forward for an enlightening stretch.
4. Keep your core engaged and if needed, try putting a block or blanket under your hip to help your pelvis stay neutral.
G. High Boat
1. Maintain a neutral spine, but reach and grab the edges of your feet or big toes and extend your legs until they are straight. Keep your inner thighs and calves strongly pressed together for stability.
2. Try to use the leverage and tension within the position to increase the length of your spine in order to lift the chest higher.
3. Continue to breathe easily in this pose for 30 seconds to one minute.
H. Low Boat
1. Gently and slowly let go of your feet. Keep your spine stable and thighs compressed.
2. Reaching your arms toward your feet, slowly lower yourself onto your back, pressing your back into the floor with a lifted chest. Lower your torso until your legs and torso are at a 45-degree angle to the floor.
I. Low Boat Pulls
1. From Low Boat, pull one knee to your chest and grasp the shin with your hands, pulling it close to you for a hip compression release while stretching the other leg out to low boat.
2. With each strong exhalation, engage your core further. Hold for three seconds and then alternate side to side for 30 seconds to one minute, with focused breathing.
J. Core Rotation
1. From the Low Boat Pulls, rest your head and shoulders on your mat and hug your knees to your chest for a breath. Then, stretch your arms out from your shoulders and press firmly into the ground.
2. Keeping your knees together, exhale and lower your legs to one side until your knees and thighs are a few inches from the floor. Hold for three seconds, return to the center and repeat on the other side.
3. Alternate side to side for 30 seconds to one minute with focused breathing. Flow power You have mastered the moves, and now it’s time to show your Flow Power. Flow and connect the moves you have mastered together with breath and intention. The result is increased energy, awareness and the feeling that anything is possible.
Release and relax
The sweetest part of practice is the release and return back to stillness. Flow through these postures, treasure your body and its ability to move and create amazing shapes, and fill your space with your presence.
Release and relax sequence
A. Knee Hug
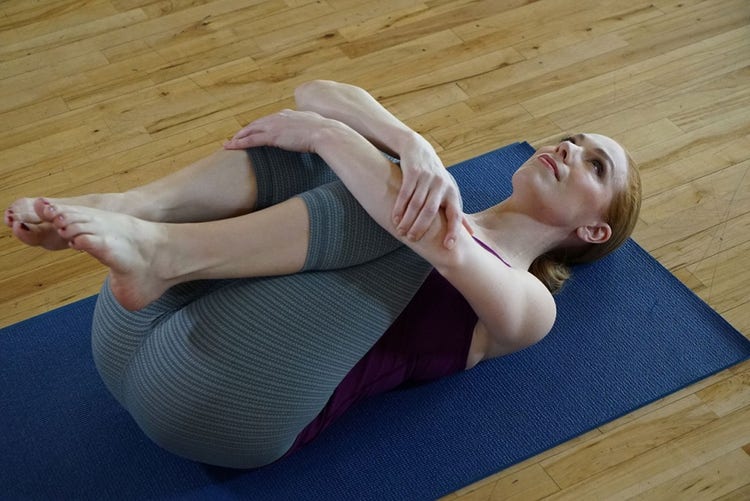
1. Rest on your back with your head and neck relaxed, core slightly engaged, and hug your knees to your chest firmly and lovingly.
2. Hold and breathe fully and deeply for 30 seconds to one minute.
B. Half Savasana
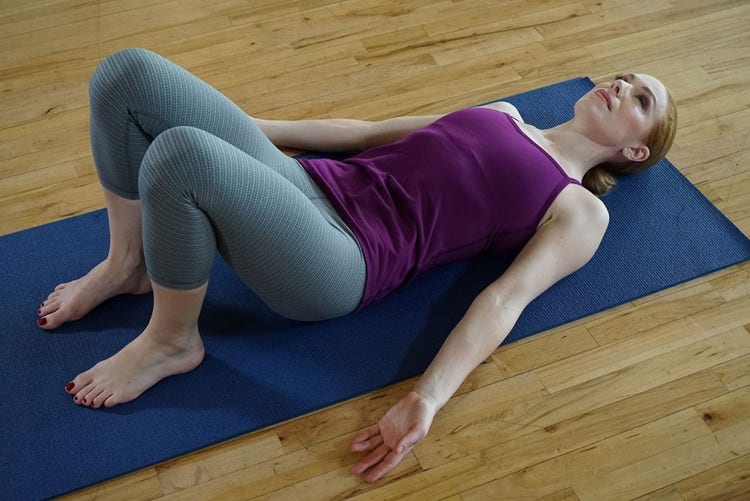
1. Place your feet on floor, knees bent and hip-width apart. Settle in and feel gravity begin to hold your body. Trust that you are supported as you breathe and allow relaxation to arrive.
2. Hold and breathe fully and deeply for 30 seconds to one minute.
C. Bridge
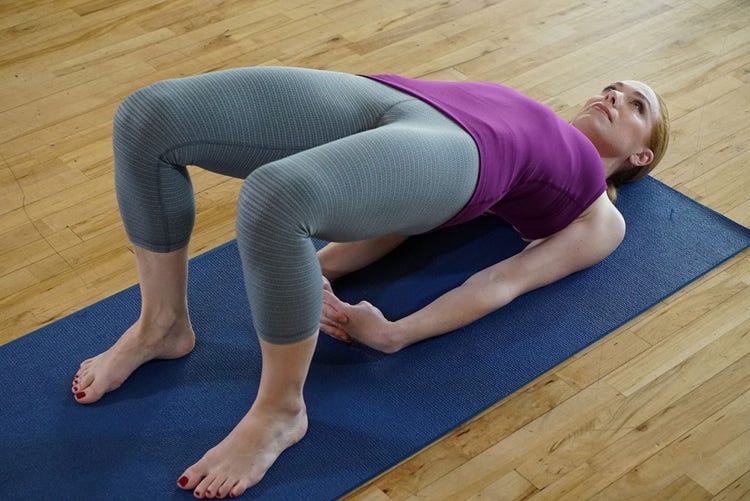
Use this pose to release the hard work muscles used in the practice.
1. Place your arms alongside your body, and press your feet firmly into the ground until your hips lift.
2. Keep a neutral pelvis position, tucking your tail slightly against the pull of gravity. Think of lifting your chest to the sky and allowing your neck to stay neutral and relaxed.
3. Hold and breathe fully and consciously for 30 seconds to one minute.
D. Savasana Breathing
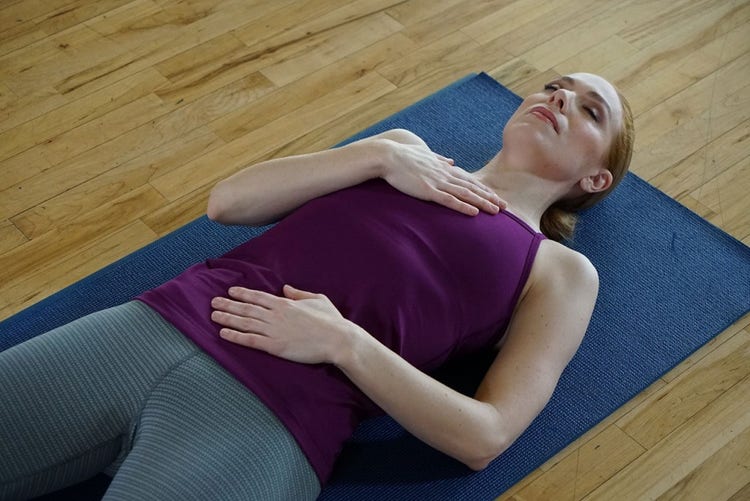
1. Release Bridge and return to Half Savasana. Remain in this pose for a moment then slide your legs out straight and relax your body to rest completely on the floor.
2. Place your hands on your belly and heart. Drink in the goodness of your core awareness, and be grateful for the gifts your body brings.
3. Hold and breathe fully and consciously for 30 seconds to one minute.
E. Savasana
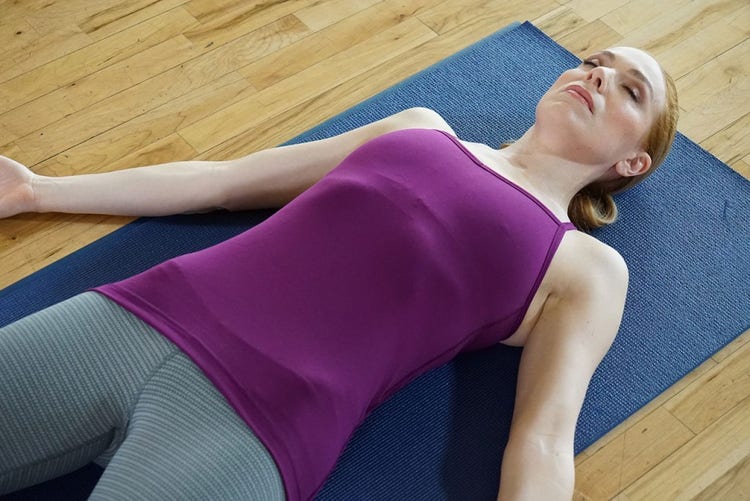
Savasana takes you into the depths of your real core. Take time to just be still and listen to your breath and your mind. Commit to being able to hear your own voice, and make a distinction between what the world is asking of you and what you desire to generate from within and gift to the world from your own power. Hold and breathe fully and consciously for up to 10 or even 20 minutes.
The model in this article is wearing apparel provided by YOGASMOGA.